公式テーマTwenty Thirteenで簡単なフォトギャラリーを作る
プラグイン非依存で作るレスポンシブデザインのフォトギャラリー
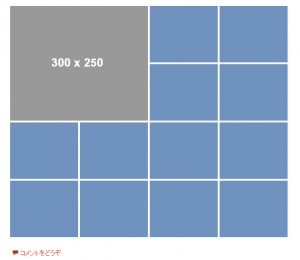
投稿ページにギャラリーのHTMLソースコードを貼り付けるだけで、下のフォトギャラリーが出来上がります。
サンプル見本
左上の大きめの画像は、
300×250
で作成し、それ以外の画像は、
148×123
でサンプルを作成しましたが、HTMLの組み方によって柔軟に画像サイズを調整できます。
HTML
画像のサンプル見本は、下のHTMLコードで組まれている例です。投稿ページに下のHTMLを貼り付けます。
<div class="gallery gallery-columns-3">
  <figure class="gallery-item">
    <div class='gallery-icon portrait'>
      <img src="/wp-content/themes/twentythirteen-kid/images/ad300x250.jpg" alt="sample" />
    </div>
  </figure>
  <figure class="gallery-item">
    <div class='gallery-icon landscape'>
      <img src="/wp-content/themes/twentythirteen-kid/images/148x123.png" alt="sample" />
    </div>
  </figure>
  <figure class="gallery-item">
    <div class='gallery-icon portrait'>
      <img src="/wp-content/themes/twentythirteen-kid/images/148x123.png" alt="sample" />
    </div>
  </figure>
  <figure class="gallery-item">
    <div class='gallery-icon portrait'>
      <img src="/wp-content/themes/twentythirteen-kid/images/148x123.png" alt="sample" />
    </div>
  </figure>
  <figure class="gallery-item">
    <div class='gallery-icon portrait'>
      <img src="/wp-content/themes/twentythirteen-kid/images/148x123.png" alt="sample" />
    </div>
  </figure>
  <figure class="gallery-item">
    <div class='gallery-icon portrait'>
      <img src="/wp-content/themes/twentythirteen-kid/images/148x123.png" alt="sample" />
    </div>
  </figure>
  <figure class="gallery-item">
    <div class='gallery-icon portrait'>
      <img src="/wp-content/themes/twentythirteen-kid/images/148x123.png" alt="sample" />
    </div>
  </figure>
  <figure class="gallery-item">
    <div class='gallery-icon portrait'>
      <img src="/wp-content/themes/twentythirteen-kid/images/148x123.png" alt="sample" />
    </div>
  </figure>
  <figure class="gallery-item">
    <div class='gallery-icon portrait'>
      <img src="/wp-content/themes/twentythirteen-kid/images/148x123.png" alt="sample" />
    </div>
  </figure>
  <figure class="gallery-item">
    <div class='gallery-icon portrait'>
      <img src="/wp-content/themes/twentythirteen-kid/images/148x123.png" alt="sample" />
    </div>
  </figure>
  <figure class="gallery-item">
    <div class='gallery-icon portrait'>
      <img src="/wp-content/themes/twentythirteen-kid/images/148x123.png" alt="sample" />
    </div>
  </figure>
  <figure class="gallery-item">
    <div class='gallery-icon portrait'>
      <img src="/wp-content/themes/twentythirteen-kid/images/148x123.png" alt="sample" />
    </div>
  </figure>
  <figure class="gallery-item">
    <div class='gallery-icon portrait'>
      <img src="/wp-content/themes/twentythirteen-kid/images/148x123.png" alt="sample" />
    </div>
  </figure>
</div>
imgタグ部分を表示した画像のパスに変更することで、オリジナルのフォトギャラリーになります。ただし、一部画像の右側マージンがうまく設定されなかったため、style.cssの以下の部分をコメントアウトしました。
.gallery-columns-1 .gallery-item:nth-of-type(1n),
.gallery-columns-2 .gallery-item:nth-of-type(2n),
.gallery-columns-3 .gallery-item:nth-of-type(3n),
.gallery-columns-4 .gallery-item:nth-of-type(4n),
.gallery-columns-5 .gallery-item:nth-of-type(5n),
.gallery-columns-6 .gallery-item:nth-of-type(6n),
.gallery-columns-7 .gallery-item:nth-of-type(7n),
.gallery-columns-8 .gallery-item:nth-of-type(8n),
.gallery-columns-9 .gallery-item:nth-of-type(9n) {
	// margin-right: 0;
}
Twenty Thirteenのstyle.cssには、
Galleries
の項目がありますので、その部分のスタイルを調査することで、ギャラリー関連のスタイルについて知ることが出来ます。
